
0%

Choosing High School Weight Room Equipment requires more than comparing prices or counting machines. A safe room should support student development, clear instruction, and consistent supervision. Coaches need equipment that matches different ages, abilities, and training goals. A ninth-grade beginner may need adjustable dumbbells and a stable bench. A varsity athlete may need racks, bumper plates, and lifting platforms. Every piece should fit the available space, leaving clear walking paths between stations. Good planning also considers flooring, lighting, ventilation, storage, and emergency access.

Safety must remain visible in daily use. Look for equipment with strong frames, secure adjustment points, readable weight markings, and reliable warranties. Ask manufacturers about testing, replacement parts, and maintenance schedules. These details often reveal more than attractive product photos. Consult certified strength professionals, school administrators, and facility managers before purchasing. Their experience can expose problems that a catalog cannot show. A coach may notice awkward spotting positions. A custodian may identify difficult cleaning areas.

No plan is flawless. Budget pressure can encourage cheaper choices, but replacement costs may become higher later. Student feedback can also reveal practical issues, such as handles that feel too wide or benches that wobble. Review the room after several weeks of use. Record repairs, congestion, and unused equipment. Then adjust the layout or future purchases. The strongest High School Weight Room Equipment plan balances evidence, supervision, durability, and the real habits of students. It should build confidence without treating safety as an afterthought.
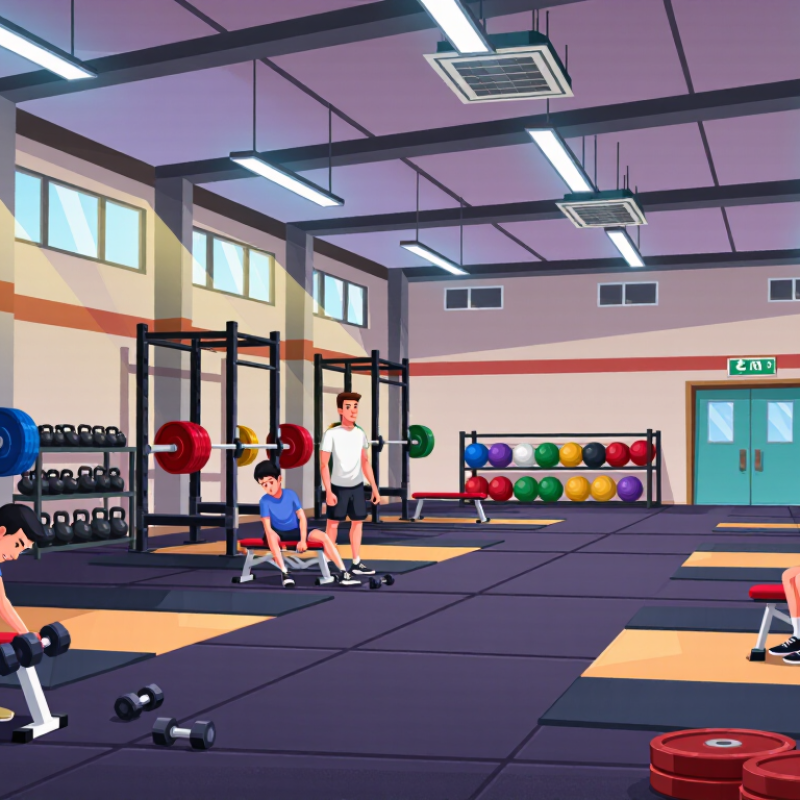
How to Choose High School Weight Room Equipment

Define Training Goals and Student Requirements

Choosing high school weight room equipment should begin with training goals, not a shopping list. A coach should ask whether students need general strength, athletic power, injury prevention, or improved movement quality. These goals shape the room. A rack supports squats and pressing, while open floor space allows jumps, carries, and mobility drills. In my experience, schools often buy too many specialty machines before measuring daily use. That choice can leave valuable equipment crowded and underused. Start with the curriculum and available supervision.

Student requirements matter just as much. Beginners need adjustable loads, clear instructions, and equipment that fits different heights and body sizes. Younger students may require lighter bars, smaller steps, and stable training surfaces. Students returning from injury need approval from qualified medical professionals and carefully limited options. A simple intake form can record experience, goals, physical restrictions, and preferred activities. Keep it private. The coach should watch students perform basic patterns before selecting heavier tools. A one-size plan sounds efficient, but it rarely is.

Safety and access should guide each purchase. Choose equipment with secure adjustment points, visible weight markings, and enough spacing for supervised movement. Check floor anchoring, storage capacity, ventilation, and emergency access. Build a realistic student-to-coach ratio into the plan. If one instructor oversees thirty students, complex stations may create avoidable risks. Reassess the room after four to six weeks. Track attendance, equipment conflicts, technique errors, and unused items. Plans will be imperfect. Some decisions may need revision, and that evidence can improve the next purchase.

Assess Available Space, Layout, and Flooring Conditions

Choosing high school weight room equipment begins with the room itself. Measure usable space, not just wall-to-wall dimensions. Include columns, doors, vents, storage, and emergency access. The NFHS 2023-24 High School Athletics Participation Survey recorded more than 8 million student athletes nationwide. Peak sessions can become crowded quickly. Plan around the busiest class, not the average class.

Allow clear walking lanes between racks, platforms, and storage. A practical design should let students move without crossing lifting zones. Check ceiling height before selecting overhead systems. Low beams can restrict pressing movements and reduce supervision visibility. Flooring also deserves careful inspection. Look for cracks, moisture, uneven areas, and weak subfloors. ASTM F2772 testing principles emphasize shock absorption, vertical deformation, and surface performance for sports flooring. Weight rooms need surfaces that reduce impact while remaining stable under heavy loads. Soft flooring is not automatically safer. That assumption needs review.

Tips: Mark equipment footprints with tape for one week. Watch traffic during the busiest period. Ask coaches where collisions or bottlenecks occur. Choose dense rubber or another tested surface over ordinary mats. Confirm the floor can support concentrated loads. I would also leave some unused space. It feels inefficient, but crowded rooms often create more risk than smaller equipment counts. Recheck measurements after installation, because doors, platforms, and storage may change the original plan.

How to Choose High School Weight Room Equipment - Assess Available Space, Layout, and Flooring Conditions
Assessment Dimension Recommended Measurement or Condition Why It Matters Equipment Selection Implication Practical Planning Action Priority
Available Floor Area Measure the usable area in square feet or square meters after excluding storage, columns, doors, and fixed obstacles. The usable footprint determines how many stations can be installed while preserving safe movement paths. Smaller rooms generally suit compact racks, adjustable benches, dumbbells, kettlebells, and wall-mounted storage. Create a scaled floor plan before purchasing equipment and reserve space for circulation. High
Clear Ceiling Height Record the unobstructed height from the finished floor to the lowest ceiling fixture, beam, duct, or sprinkler component. Insufficient overhead clearance can limit rack height, pull-up exercises, medicine-ball drills, and lifting technique. Select equipment that remains below the lowest obstruction and allows users to exercise without contacting the ceiling. Verify the highest point of every planned station against the actual clear ceiling height. High
Room Shape and Columns Identify narrow sections, corners, structural columns, recesses, and areas with restricted visibility. Irregular spaces can create congestion and reduce supervision from the coaching position. Use linear racks along walls, place storage in dead spaces, and avoid positioning high-use stations behind columns. Mark all permanent obstructions on the layout and maintain clear sightlines across the training floor. High
Circulation and Safety Clearance Provide clear paths between stations, entrances, exits, storage areas, and emergency equipment; confirm local code requirements. Clear circulation reduces collision risks, improves supervision, and supports emergency access. Do not fill the entire room with equipment. Prioritize fewer stations with adequate operating and walking space. Use floor markings to define lifting platforms, walkways, queue areas, and no-storage zones. High
Training Zones Separate areas for free weights, racks, conditioning, mobility, warm-up, and equipment storage. Zoning reduces conflicting traffic patterns and allows multiple groups to train simultaneously. Place heavy or fixed equipment near the perimeter, while keeping open space available for dynamic activities. Design the room around student flow: entry, warm-up, training, cooldown, and exit. High
Existing Flooring Type Document whether the substrate is concrete, wood, tile, resilient flooring, or another surface, including its condition. Different floors vary in impact absorption, traction, load tolerance, and resistance to abrasion. Choose protective flooring and equipment bases that are compatible with the existing substrate. Inspect for cracks, loose sections, moisture, uneven transitions, and areas requiring repair before installation. High
Impact and Load Protection Consider the expected use of dropped weights, repeated foot traffic, rolling equipment, and concentrated rack loads. Impact protection helps reduce damage to the subfloor, equipment, and surrounding building structure. Use appropriate rubber or other impact-resistant surfaces in lifting zones and under heavy equipment. Confirm flooring thickness, density, seams, and load distribution with the facility or flooring professional. High
Traction and Moisture Control The floor should provide stable footing and remain manageable under perspiration, cleaning, and occasional moisture. Reliable traction supports safe lifting, balance, and movement during high-use school sessions. Avoid overly slick surfaces in active zones and select flooring that can be cleaned with approved maintenance products. Test traction when dry and damp, and establish a routine for cleaning and drying the floor. High
Floor Flatness and Transitions Check for uneven areas, raised edges, gaps, thresholds, and abrupt changes between flooring materials. Uneven transitions can cause trips, unstable equipment, and inconsistent lifting positions. Use level flooring under racks, benches, platforms, and selectorized equipment; avoid placing movable stations over damaged areas. Repair or level problem areas before anchoring or positioning equipment. High
Anchoring Requirements Determine whether racks or other equipment require anchoring and identify the substrate beneath the flooring. Anchoring can affect structural integrity, utilities, waterproofing, and future room changes. Choose freestanding equipment when drilling is restricted; obtain approval before making permanent penetrations. Coordinate with facilities personnel to locate utilities and verify permitted attachment methods. High
Electrical and Ventilation Access Map outlets, lighting, HVAC supply and return points, windows, and areas affected by airflow. Equipment placement should not block ventilation, lighting, electrical access, or maintenance routes. Keep powered equipment near suitable outlets and avoid placing tall storage in front of vents or windows. Include service access and ventilation clearance in the equipment layout, not just the equipment footprint. Medium
Storage Capacity Plan dedicated storage for bars, plates, dumbbells, kettlebells, bands, mats, and cleaning supplies. Proper storage keeps walkways clear and reduces trip hazards and equipment damage. Use vertical or wall-based storage where appropriate, while ensuring that loaded storage remains stable and accessible. Estimate storage needs from the total equipment inventory rather than adding storage after installation. High
Supervision and Visibility The coach should be able to view major training zones, entrances, exits, and high-risk activities. Good visibility supports instruction, spotting, behavior management, and rapid response. Prefer lower-profile storage and arrange racks so that tall equipment does not create blind spots. Review the layout from the instructor’s normal standing position before finalizing equipment locations. High
Access and Delivery Route Measure doors, corridors, elevators, loading areas, and turning points from the delivery entrance to the room. Large or heavy equipment may not fit through the available route even when it fits inside the room. Favor modular equipment that can be delivered in manageable sections when access is limited. Record doorway widths, ceiling restrictions, floor transitions, and delivery scheduling requirements. Medium
Future Flexibility Reserve some open floor area and avoid layouts that depend on every available inch. High school programs often change with enrollment, class schedules, sports, and training methods. Prioritize modular, adjustable, and movable equipment that can support multiple user groups. Review the proposed layout for future expansion, maintenance access, and seasonal program changes. Medium
Measurements should be verified on site, and final clearances, anchoring methods, flooring specifications, and emergency access should comply with applicable building, fire, accessibility, and school-facility requirements.

Compare Equipment Types, Features, and Adjustability

Choosing high school weight room equipment requires more than counting stations. The key comparison is how each type supports safe, varied, and adjustable training. Free weights build coordination and offer many exercise options, but they require careful instruction and secure storage. Selectorized machines guide movement and suit beginners, though they usually train fewer movement patterns. Cable systems sit between both choices. They allow controlled resistance, multiple angles, and smoother progression.

Adjustability should guide every purchase decision. Look for benches with several backrest positions, racks with easy-to-read height markings, and machines that fit different body sizes. Seat depth, handle position, resistance increments, and range-of-motion limits all matter. Small changes can improve comfort and technique. They can also prevent awkward setup.

Do not overlook access and supervision. Equipment should allow coaches to see athletes clearly, with enough space around moving parts. Durable frames, simple adjustment points, protective padding, and accessible safety stops support daily use. In practice, the best room usually combines platforms, dumbbells, adjustable benches, racks, cables, and a few guided machines. Too much specialized equipment can reduce flexibility. Too little guidance can overwhelm new lifters.

No setup is perfect. A tall student may find a standard bench uncomfortable, while a smaller student may struggle with a fixed handle. Test equipment with actual students before ordering whenever possible. Ask whether adjustments are fast during busy sessions. If a coach needs a manual every time, the design may be wrong for school use. Safety still depends on training, inspection, and attentive supervision.

Evaluate Safety Standards, Durability, and Maintenance Needs

How to Choose High School Weight Room Equipment

Evaluate Safety Standards, Durability, and Maintenance Needs

Choosing high school weight room equipment requires more than comparing prices. Safety starts with stable frames, protected moving parts, secure adjustment pins, and clear load ratings. Ask for documented testing against applicable national and international safety standards. A qualified installer should verify anchoring, spacing, and floor compatibility before students use the room. Small details matter. Rounded edges and non-slip surfaces can prevent avoidable injuries during busy training periods.

Durability depends on construction quality and daily use. Inspect welds, frame thickness, protective coatings, stitching, and upholstery before purchase. Equipment should tolerate repeated adjustments, dropped weights, and frequent cleaning. Resistance cables need strong end fittings, while benches should remain firm under uneven loading. Choose parts that staff can replace without dismantling an entire machine. In practice, the strongest-looking product is not always the easiest to maintain.

Maintenance needs should be written into the selection process. Staff can complete brief daily checks for loose bolts, damaged cables, cracked padding, and unusual movement. Weekly inspections should include torque checks and anchor reviews. Keep records. These notes reveal recurring problems and support responsible repairs. Cleaning products must suit each surface, since harsh chemicals may weaken vinyl or protective finishes. No checklist catches everything. A rushed inspection can miss a small crack, so staff training and periodic review by a qualified technician remain essential.

Plan the Budget, Installation, and Equipment Supervision

Choosing high school weight room equipment begins with a realistic plan, not a shopping list. Measure the room, count athletes, and identify daily training groups. Include flooring, ventilation, storage, lighting, delivery, assembly, and staff training in the budget. Leave a contingency reserve of 10 to 15 percent for site surprises. Wiring can surprise you. Ask a qualified facilities professional to review load limits and electrical needs. An attractive estimate may still omit maintenance and replacement costs.

Installation should follow a written layout approved by school administration and a qualified installer. Keep lifting zones clear, with safe distances between racks, platforms, benches, and walls. Anchor equipment only after checking the floor structure and local safety requirements. Use clear assembly records and photograph completed connections. That evidence supports later inspections. Schedules can slip. One rushed adjustment can create years of avoidable risk.

Supervision is part of the equipment, even when it has no price tag. Assign trained staff to inspect bolts, cables, pads, pins, and platform edges before use. Record defects, remove unsafe items, and arrange repairs through documented procedures. Students also need instruction on spotting damaged equipment and reporting it immediately. Staff should review incidents and near misses each month. Our first layout looked efficient, but crowded traffic near the racks proved otherwise. That mistake changed our inspection routine.

How to Choose High School Weight Room Equipment

Plan the budget, installation, and equipment supervision with a practical allocation model.

This planning baseline assigns the largest share of the budget to strength and conditioning equipment, while reserving funds for impact-resistant flooring, professional installation, storage, staff supervision, and contingency needs. Actual costs should be adjusted for room size, student capacity, local construction requirements, and equipment specifications.

FAQS

What should guide a school’s equipment choices?

Start with training goals, not a shopping list. Decide whether students need strength, power, injury prevention, or better movement. A rack and open floor often serve more students than specialty machines. Plans can be wrong. Review actual use later.

Which students need special equipment considerations?

Beginners need adjustable weights, clear instructions, and equipment for different body sizes. Younger students may need lighter bars, smaller steps, and stable surfaces. Students returning from injury need approval from qualified medical professionals. One plan rarely fits everyone.

What information should a student intake form record?

Record experience, goals, physical restrictions, and preferred activities. Keep the information private. Coaches should observe basic movements before assigning heavier loads. The form helps, but it cannot replace careful supervision.

How much space should a weight room provide?

Measure usable space around columns, doors, vents, storage, and emergency exits. Plan for the busiest class, not the average session. Leave clear lanes between racks, platforms, and storage. Crowded rooms create problems quickly.

How can a school identify layout problems?

Mark equipment footprints with tape for one week. Watch traffic during the busiest period. Note collisions, blocked doors, and students crossing lifting zones. The tape may reveal an awkward layout.

What flooring features matter in a weight room?

Check for cracks, moisture, uneven areas, and weak subfloors. Choose a tested surface that absorbs impact and stays stable under heavy loads. Soft flooring is not automatically safer. That assumption deserves review.

What safety details should equipment include?

Look for secure adjustment points, visible weight markings, and adequate spacing. Confirm floor anchoring and storage capacity. Check ventilation and emergency access. Small details matter during busy sessions.

How should schools evaluate equipment after installation?

Recheck measurements after platforms, doors, and storage are installed. After four to six weeks, track attendance, equipment conflicts, technique errors, and unused items. Some purchases may need revision. That is not failure; it is useful evidence.

Conclusion

Choosing High School Weight Room Equipment begins with understanding the students’ training goals, experience levels, and physical development. Equipment should support strength, conditioning, mobility, and safe skill progression for a diverse student population. Before making selections, schools should assess the available space, room layout, ceiling height, ventilation, traffic flow, and flooring conditions. A well-planned environment allows students and instructors to move safely and use each station effectively.

Schools should compare equipment types according to functionality, adjustability, user capacity, and ease of use. Safety features, durable construction, and simple maintenance are essential for equipment that will receive frequent use. The planning process should also include a realistic budget covering delivery, installation, inspections, repairs, and future replacement parts. Finally, clear supervision procedures, regular equipment checks, staff training, and student instruction can help maintain an organized, safe, and effective training environment.

Clara

Clara

Clara is a professional marketing specialist with a strong understanding of the company’s products, customer needs, and the practical details that matter when choosing the right solution. She regularly contributes expert articles to the company website, sharing clear, useful information that helps......